
When my old phone died back in April/May, I bought a new phone but was unable to find many cases for it. In the end, I decided to buy two clear cases and customize them myself. One I intend to do decoden, and the other I am using as a "changing" case by making custom inserts.
It's a very easy project so this is not so much a tutorial as sharing my process :3
This is an affordable way to be able to change your phone to match your moods (or outfits if you are really into a completely matching aesthetic??)
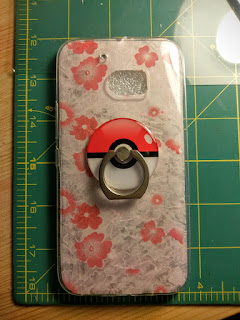
First, I wanted a phone ring because I now hold my phone in my hand constantly while playing Pokemon GO. Of course I bought a Pokeball phone ring ^u^v
If you have anything you'd like to glue to the outside of your case, such as a phone ring, a border of gems, etc., glue those on first so you can see how it affects your overall layout.
Note: If you have a silicone case like this, use a glue containing cynoacrylate to ensure a solid bond
I tried other "permanent" adhesives but they did not stick to the case at all! Check the ingredients and the safety warnings on the adhesive you use!
After doing the outside of your case, it's time to do the inside!
You will need a template for your phone to make sure the insert fits inside without affecting your camera, flash, any sensors (my phone has a laser auto-focus sensor), or fit of the case. Since I had the paper inserts that came with my phone case, I used that. If you don't have one, first trace around your case and cut it out. Try it in your phone and trim the edges as needed. You will need to trim more if you have a curved phone versus a flat one.
Once the paper fits between your phone and case nicely, trace around the openings in your case for the camera, etc.
For the small hole I used an awl, but a hole-punch would make a cleaner opening if you have a proper-size hole-punch.
Next, choose your backing paper! I used some handmade paper I bought at Daiso around eight years ago that I never got around to using and have been carrying around...

Place your pattern on the paper to see how the background looks. Choose the area you'd like to cut and cut around your pattern. Because my paper was delicate, I didn't trace the pattern as the ink may have soaked into the fibers and a pencil may have dragged across the delicate paper.
If your paper is delicate, I suggest to add a layer of thin acetate to the back to keep it from tearing when you switch your inserts. Make sure not too use one that is too thick, especially if your phone has a curved back as it make cause your case to lift away from the phone body.
Decorate with any FLAT decorations you'd like! Washi tape, stickers, lace tape, deco tape, drawing and painting, etc.

It's a very easy project so this is not so much a tutorial as sharing my process :3
This is an affordable way to be able to change your phone to match your moods (or outfits if you are really into a completely matching aesthetic??)
First, I wanted a phone ring because I now hold my phone in my hand constantly while playing Pokemon GO. Of course I bought a Pokeball phone ring ^u^v
If you have anything you'd like to glue to the outside of your case, such as a phone ring, a border of gems, etc., glue those on first so you can see how it affects your overall layout.
 |
| Keeping your phone safely in your hands |
I tried other "permanent" adhesives but they did not stick to the case at all! Check the ingredients and the safety warnings on the adhesive you use!
After doing the outside of your case, it's time to do the inside!
You will need a template for your phone to make sure the insert fits inside without affecting your camera, flash, any sensors (my phone has a laser auto-focus sensor), or fit of the case. Since I had the paper inserts that came with my phone case, I used that. If you don't have one, first trace around your case and cut it out. Try it in your phone and trim the edges as needed. You will need to trim more if you have a curved phone versus a flat one.
Once the paper fits between your phone and case nicely, trace around the openings in your case for the camera, etc.
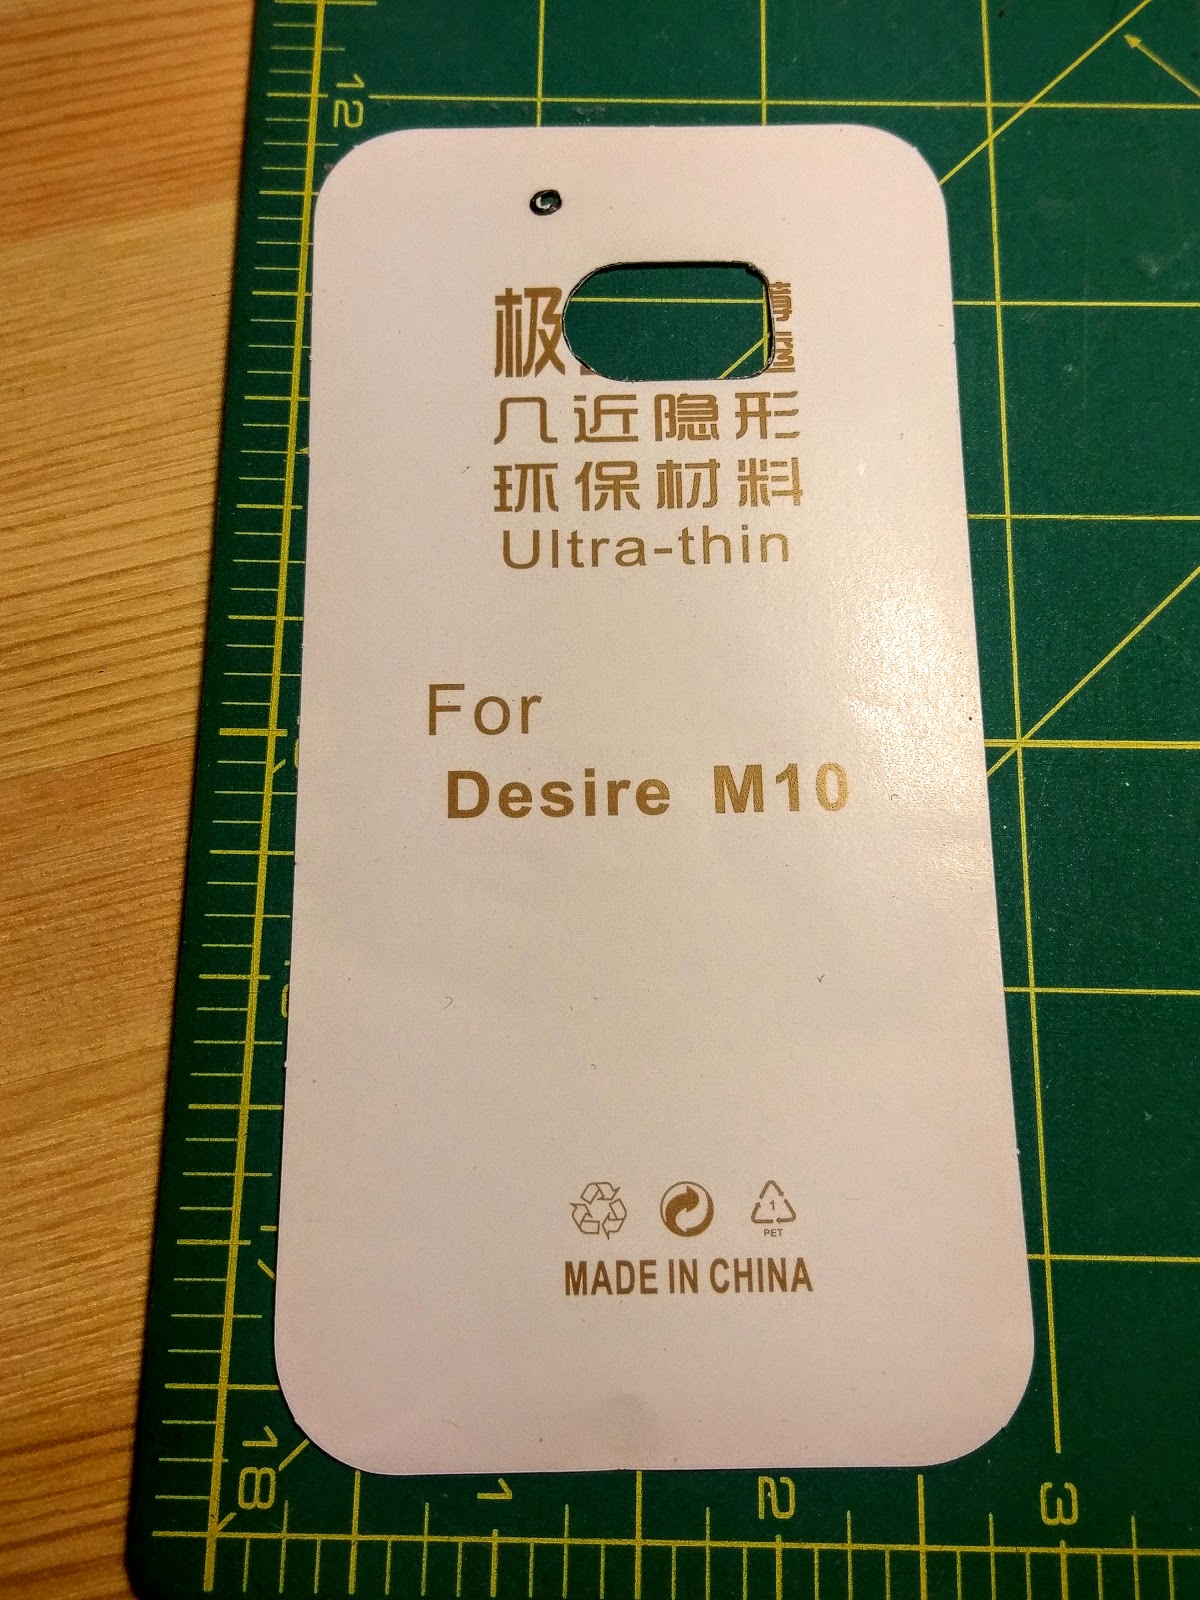 |
| My pattern |
Next, choose your backing paper! I used some handmade paper I bought at Daiso around eight years ago that I never got around to using and have been carrying around...

Place your pattern on the paper to see how the background looks. Choose the area you'd like to cut and cut around your pattern. Because my paper was delicate, I didn't trace the pattern as the ink may have soaked into the fibers and a pencil may have dragged across the delicate paper.
 |
| Choosing what section to cut |
 |
| With acetate glued |
Remember than any raised designs will prevent your case from fitting over the insert!!
I left mine plain for now as my Pokemon stickers are is storage (I will be moving soon) but I do plan to make a Pokemon insert for my phone, as well as a Pokemon deco case on the other case I have.
I hope you found this helpful and have fun customizing your own cases!
 |
| Simple and elegant |