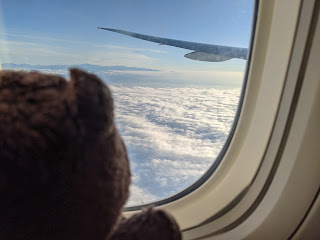
Safely landed in Taiwan and out of quarantine time now! Fortunately, I was able to quarantine at my mom's, though I had to remain in one room only. I took photos of some packing I did and thought I'd share about my ideas and what I did for moving internationally!
First step is to just declutter as much as possible. As I was leaving with no intention of returning to stay, I straight up threw away anything I had not used during my time (1.5 years) in the USA. Because I had moved there recently, I had not that many things anyway, but had accumulated some crafting items so I had to go through and decide what is replaceable and what is worth bringing.
Next, for jewelry that may become tangled, I threaded the chain portion through a straw and connect the clasp again. Reusable straws can work too, but I found this pack of disposable ones at the house.
Then, I placed the necklaces on a clean towel and rolled it up. I secured the roll with my bracelets to keep them in shape
Most of the necklaces only fit one side of the necklace into the straw because the lobster claw clasp is too large for this size. If you have a chunky necklace, a boba straw can work, too!
For my pressed powder products, I put a cotton round on top to add a buffer and help prevent them from shattering during the trip. While powder product can usually be re-pressed if it shatters, it saves you the mess and the hassle!
Of my powder pans, the Wet n Wild was definitely the most "loosely" pressed and fragile, but it survived just fine!
I actually dropped my Laura Mercier shimmer bloc while packing and it shattered... it is a baked formula with four divided colors so I decided just to declutter it since I only used two of the colors anyway. And of course, the two I used most were the ones that shattered the worst and got mixed up along with debris on the floor!
For squeeze-tube liquid products, get the air squeezed out of them before putting the lid back on. The air pressure in the plane will change and the cargo area is not pressurized as much as the cabin, so the air will expand inside these soft tubes! Make sure there is room for it to expand so you do not end up with a mess like I did on my original flight to the USA... one of my concealers had a little accident O_Q
Of course, then bag all liquids in resealable plastic bags, and then place them all together in another waterproof bag. My checked suitcase has a built-in waterproof compartment so that is what I used. If you are packing them directly on clothes, definitely use multiple layers of plastic!
Deciding what to put in my carry-on luggage was also important. On the off chance that luggage is delayed, rerouted, lost, etc., it is important to have your vitals (medication, ID, work-related things) on your person as well as a change of clothes for a few days.
Electronics already are in my backpack, so that was a simple choice, and then I chose the most "hassle-free" clothing I could. I packed a soft no-wire bra (from UNIQLO), a dress with a built-in bra top (also UNIQLO), and easy-care cotton T-shirts and skirts, a hoodie for warmth, a blanket (can be used on the plane, too!), a journal and pens, some hair elastics because long hair can tangle easily, and as many socks and underwear as I could shove into the spare spaces around everything else.
Check your checked baggage! Because I was moving, not traveling, I decided to go with overweight bags. It would end up being more affordable to pay the flat charge to get 20lb. extra in each bag than to replace 40lb. worth if things back in Taiwan.
HOWEVER, because my flight was cancelled and (14 hours of customer service later....) I was rebooked with a different airline, the overweight fee was DOUBLE the original.
What would have been US$100 total for two overweight bags became US$200 !!! That was not worth it. Fortunately, my friend Duke had an extra suitcase he gave me, as a third checked bag (up to 50lb.) was US$100 or so. Ended up being a much better deal!
When weight is not the main issue, being able to cram everything in became the biggest problem. I used vacuum-sealing bags for my Lolita clothing and petticoats, sweaters/hoodies, and wore my overcoat and boots to save space.
If you do not have actual vacuum-sealing bags with the one-way valve and everything, you can actually create a similar effect with regular sturdy bags (I recommend kitchen bin bags), filling it with compressible items, pushing out as much air as possible, and then sticking a vacuum hose in the opening to further compress it. Cinch the top of the bag closed with your hand and tie a knot (do NOT use the drawstring as it will not be airtight) as quickly as possible after removing the vacuum hose.
Pack the vacuumed bags soon after compressing, just in case it is not a perfect seal and air begins to slowly leak in. I stuck the bags in the suitcases, filled the spaces around them with smaller items, and then slammed the lid down and zipped the cases shut. One of the bags DID reinflate on the flight over, but it ended up not being a big deal since I already had everything crammed in.
That's it for my very belated, short little tips/tutorial! I'm in the process of moving into my own place now, so I'll update again after.
Thanks for sticking around and there will be more fun things soon!


No comments:
Post a Comment
please share your thoughts!